This post describes how to create and fill data source objects for tutorial Create Azure API App with AAD authentication and web jobs. It considers Azure SQL server, database, database project and model class library.
Create SQL server Azure
Open Azure portal, log in with your Microsoft account.
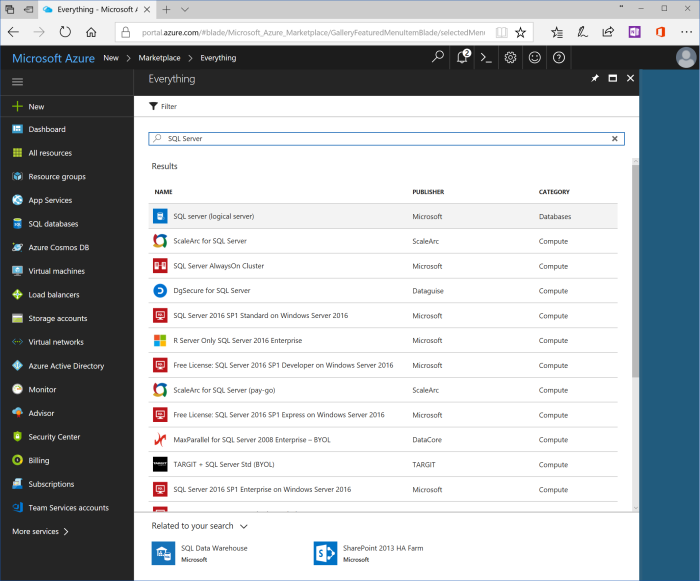
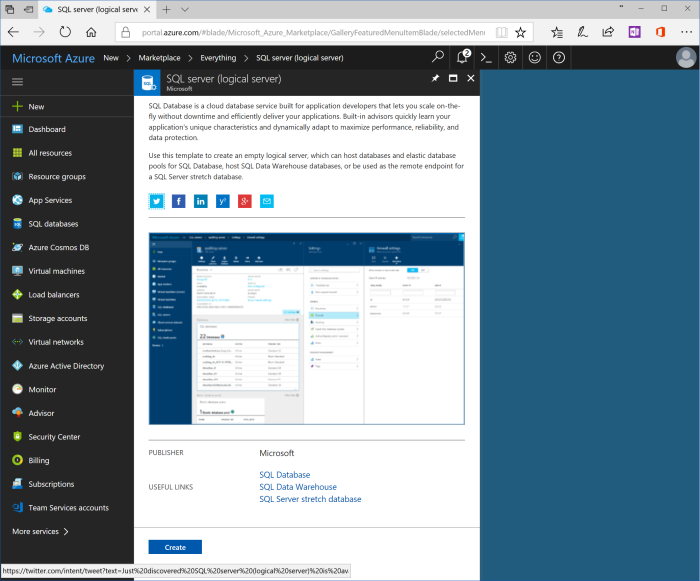
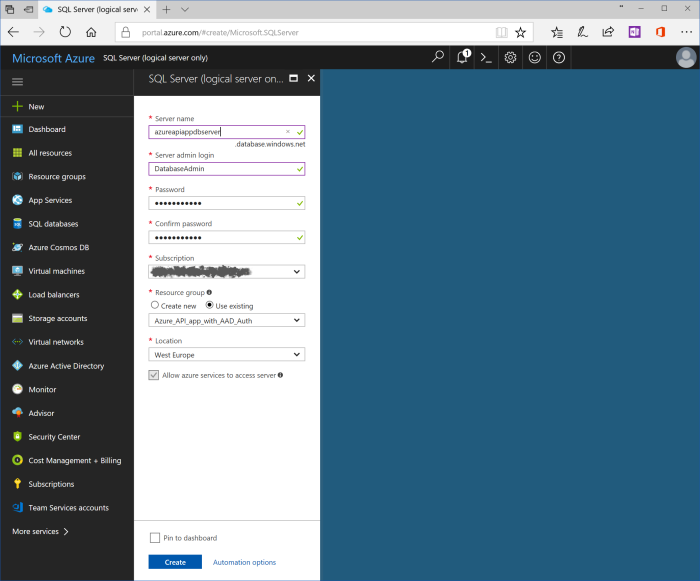
Click "+ New" in the left pane, and search from "SQL Server" object. Search blade shows the list of found objects, where the first should be "SQL Server (logical server)" by Microsoft. Click on it, and click "Create" on the next blade.

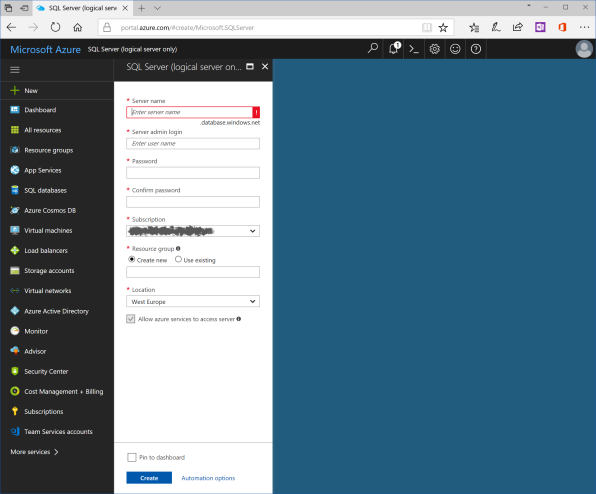
Use the following values for properties of SQL Server:
| Property | Value |
|---|---|
| Server name | azureapiappdbserver |
| Server admin login | DatabaseAdmin (you can't use standard names like Admin, Administrator, etc.) |
| Password | Strong password |
| Confirm password | The same strong password |
| Subscription | Your subscription |
| Resource group | Use existent, and choose "Azure_API_app_with_AAD_Auth" |
| Location | Use the closest data center to your customers |
Let's note, that server name is used as part of direct url, so it should be unique. That is why proposed name "azureapiappdbserver" should be extended by unique prefix like your second name, project title, so on.
Click "Create" to create SQL server.
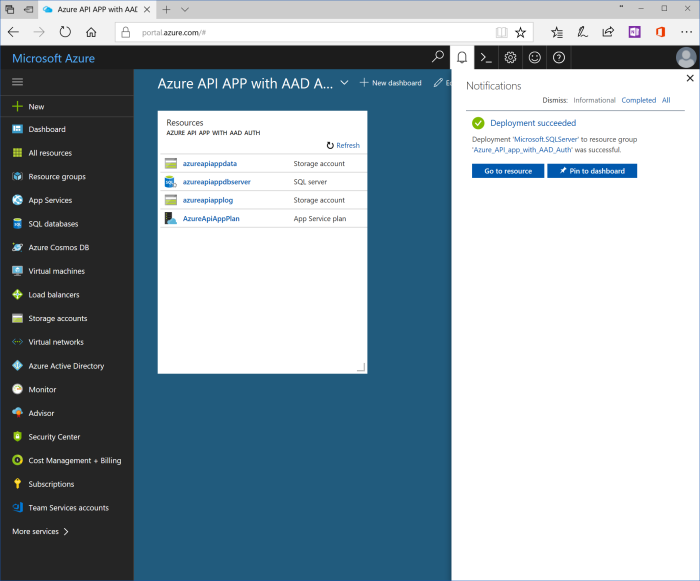
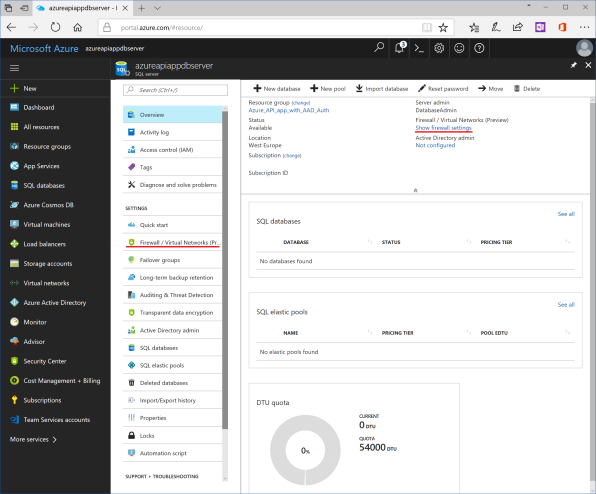
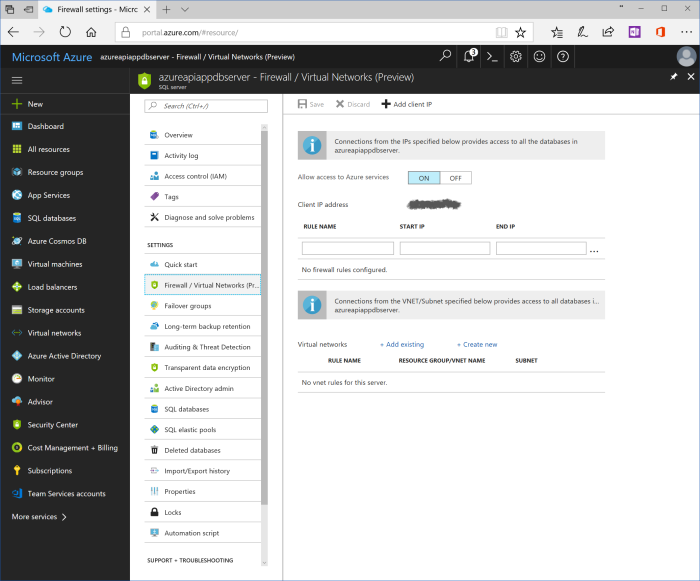
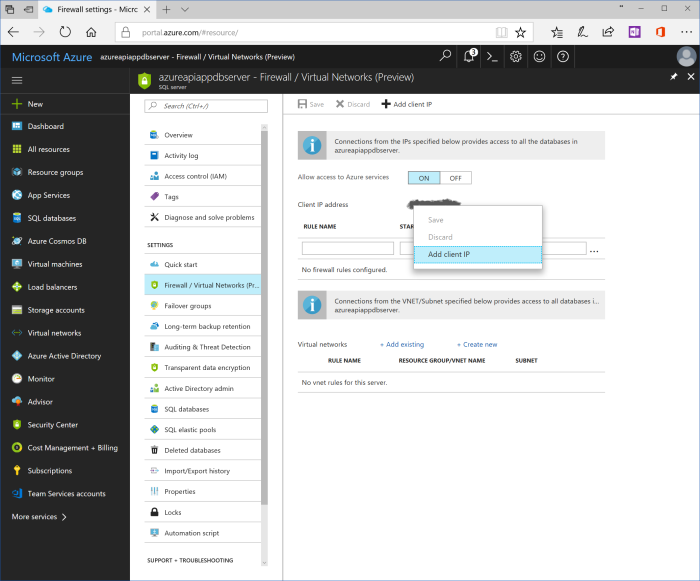
Click on server's name in Resource group tile and go to blade for SQL server. Click either on "Firewall / Virtual Networks (Preview)" in the left part of the blade or at "Show firewall settings" in the top of the blade. Blade with firewall settings is opened.
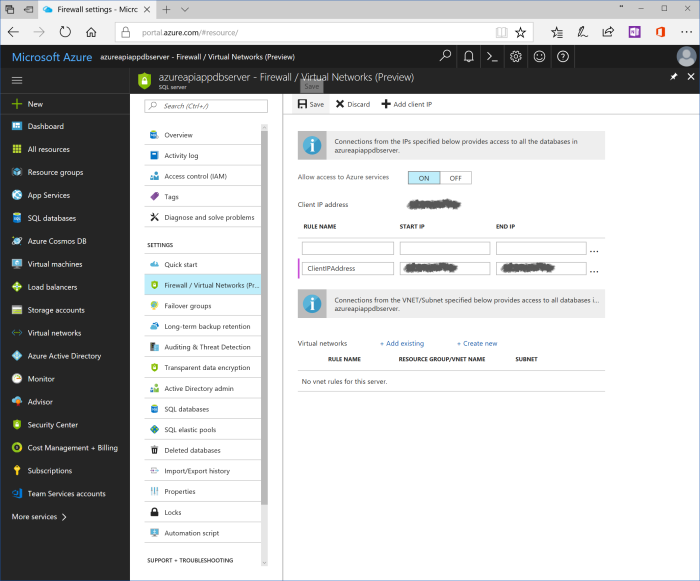
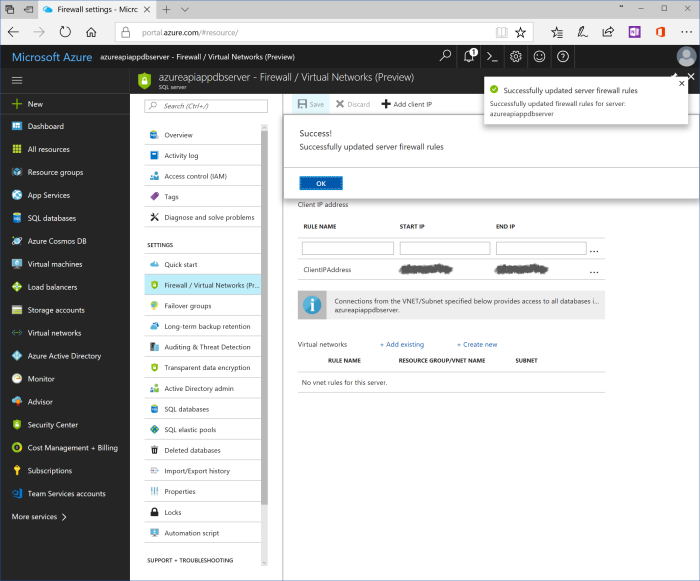
In order to have access to SQL server, it is necessary to add firewall rule that allows traffic from current user IP address. Blade shows current IP address titled as "Client IP address". Right click on this address and choose "Add client IP" menu item. New rule would be created. It could be updated by meaningful name and/or IP address range. Click "Save" in the top left corner of the blade.
Create SQL Azure server
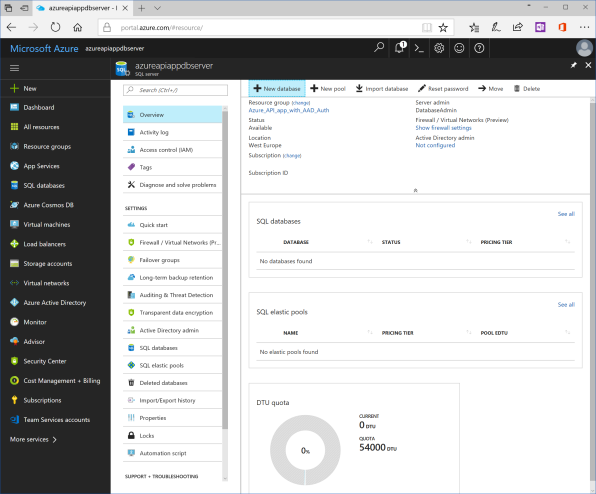
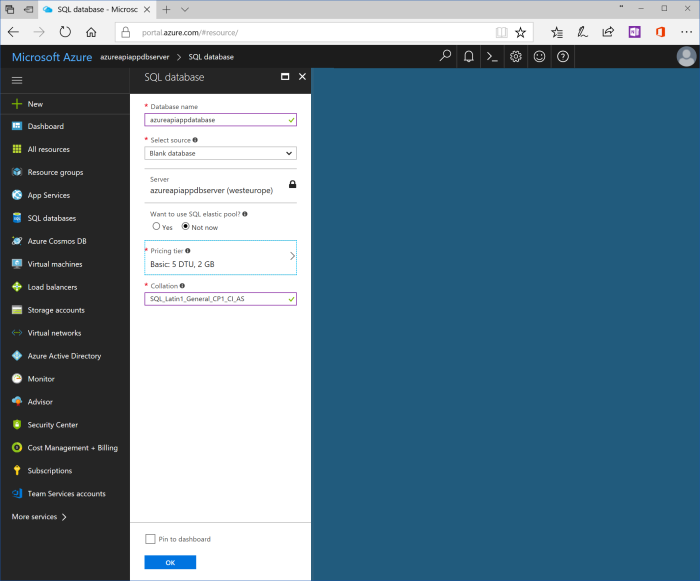
Go to overview blade of SQL Server. Click "+ New database" in the top of the blade. Blade that creates new database is shown.
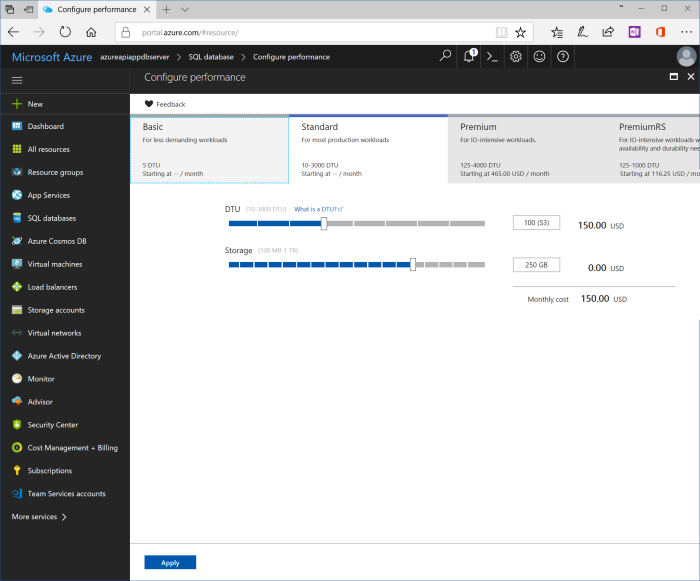
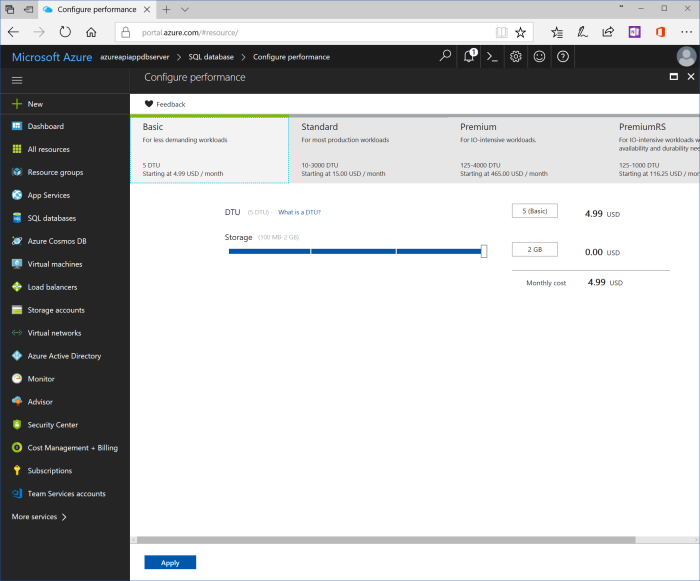
Use the following values for properties of SQL database:
| Property | Value |
|---|---|
| Database name | azureapiappdatabase |
| Select source | Blank database |
| Server | Keep current value, azureapiappdbserver (location) |
| Want to use SQL elastic pool? | Not now |
| Pricing tier | You may keep default value “Standard S3”. Otherwise, click at pricing tier button and choose another tier. For preview and test purposes “Basic” is enough. |
| Collation | SQL_Latin1_General_CP1_CI_AS |


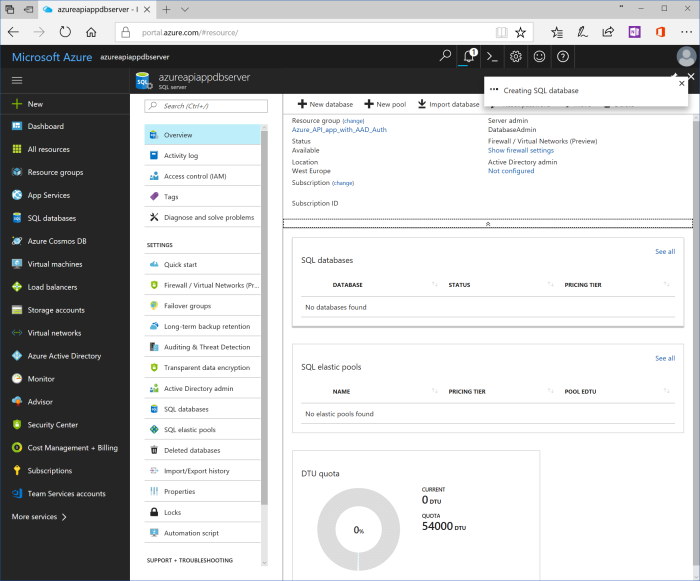
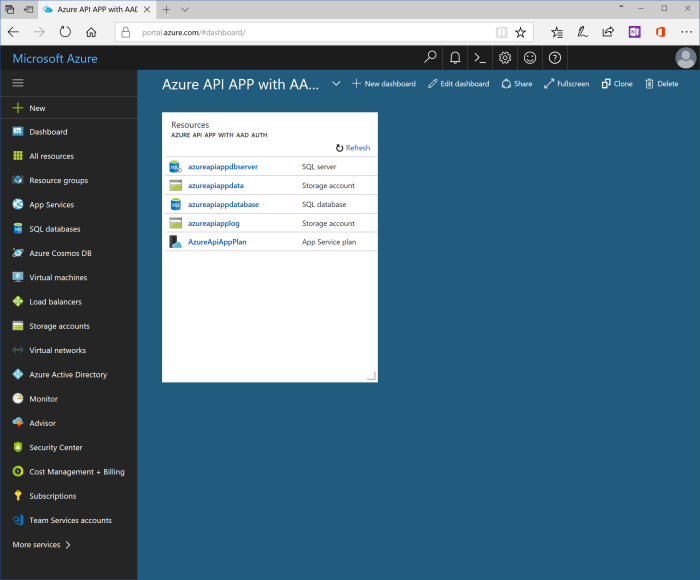
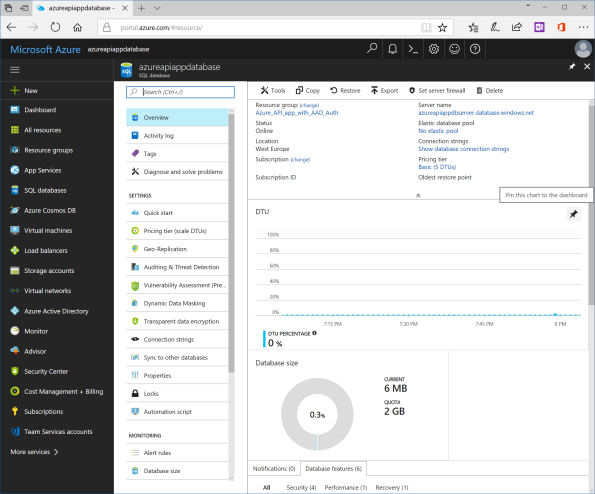
Dashboard is shown. Click on database's name in Resource group tile and go to blade for SQL database.
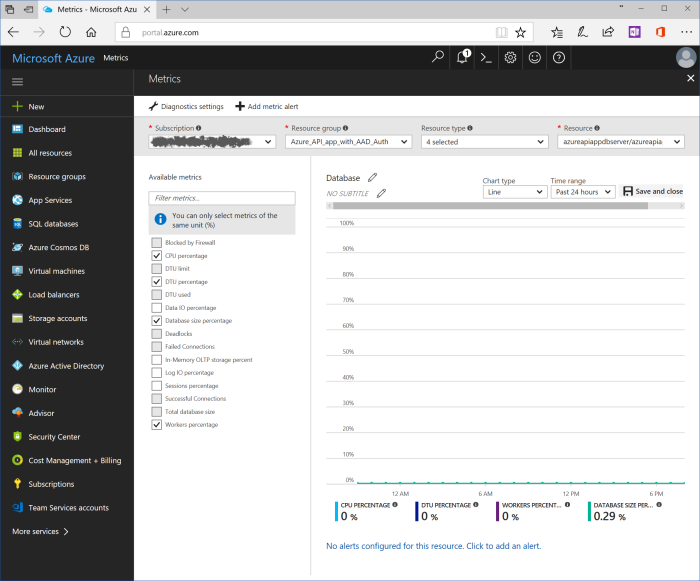
In the middle of the blade database chart "DTU" is located. Click on the pin in the upper right corner and pin chart to the dashboard.
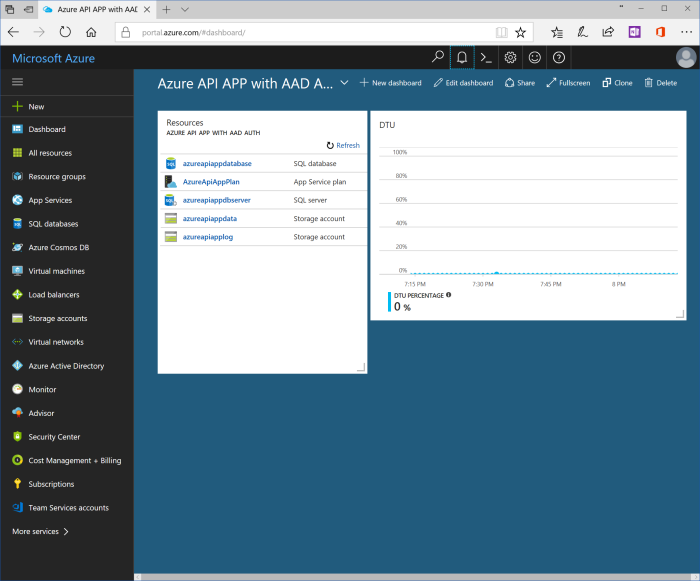
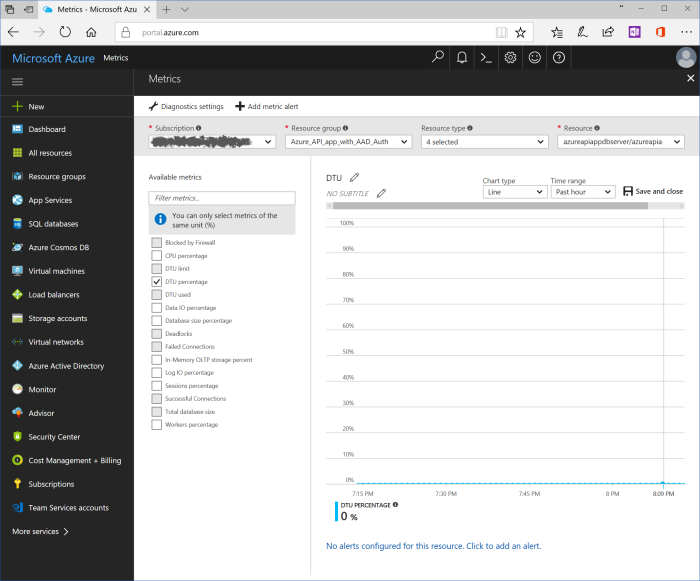
Click on "Microsoft Azure" and open dashboard. Double click on new tile, customize chart blade is shown.
There are plenty various settings could be set. For example, rename title to "Database", change period to "Past 24 hours", check such settings as "DTU percentage", "Database size percentage", "Workers percentage". Click "Save and close". Dashboard with updated tile is shown.

Database projects
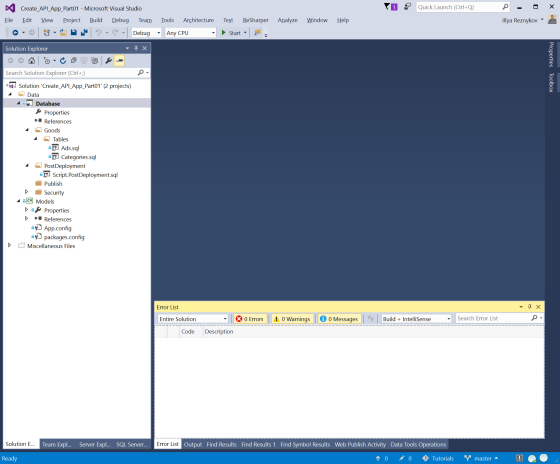
Solution with database project and model class library could be found at GitHub repository. It contains the following projects:
Database– database project that describes database structure: schemas, tables, indexes, triggers and constraints. These scripts define and fill reference tableCategoriesand define tableAdswhich contains description of ads. Let's note that target platform is set to Microsoft Azure SQL Database V12. This project will be deployed to created Azure database as data-tier application, that allows control changes and be automated;Models– a class library that contains Entity Framework context from the deployed database. Solution includes empty class library with addedEntityFrameworkNuGet package.
Deploy data-tier application to Azure SQL database
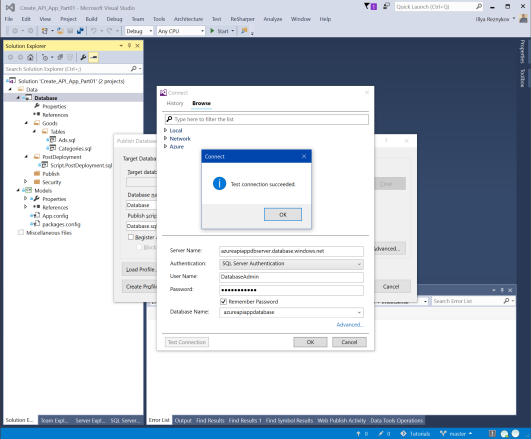
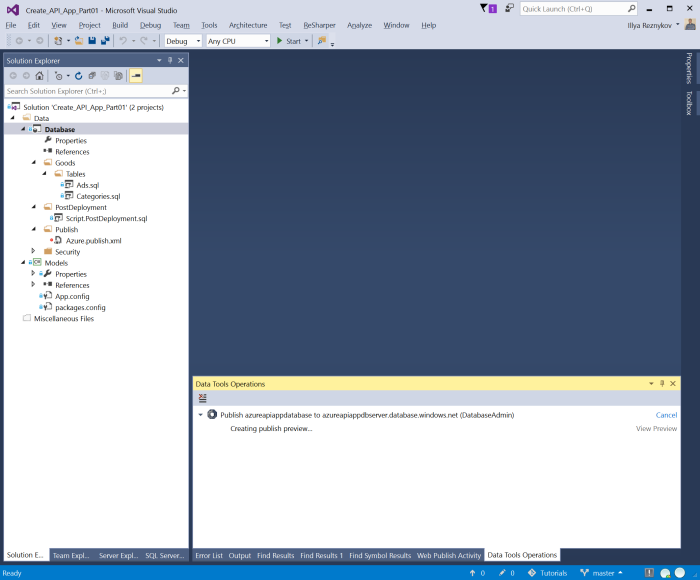
Launch Visual Studio and open solution Create_API_App_Part01.sln from repository. Screenshots are made with Visual Studio 2015. In order to successfully deploy database project to Azure database check the latest version of SSDT. Otherwise, you may get the error message: "Unable to connect to master or target server '%databasename%'. You must have a user with the same password in master or target server '%databasename%'."
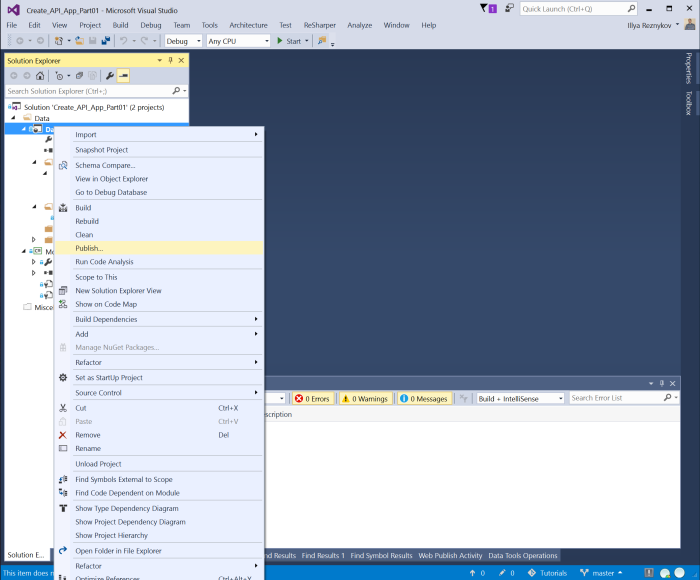
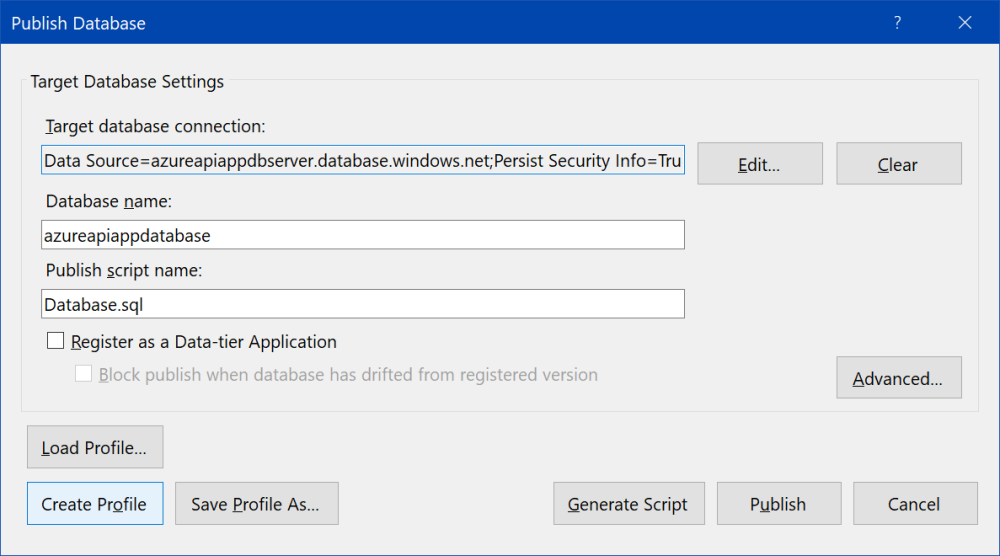
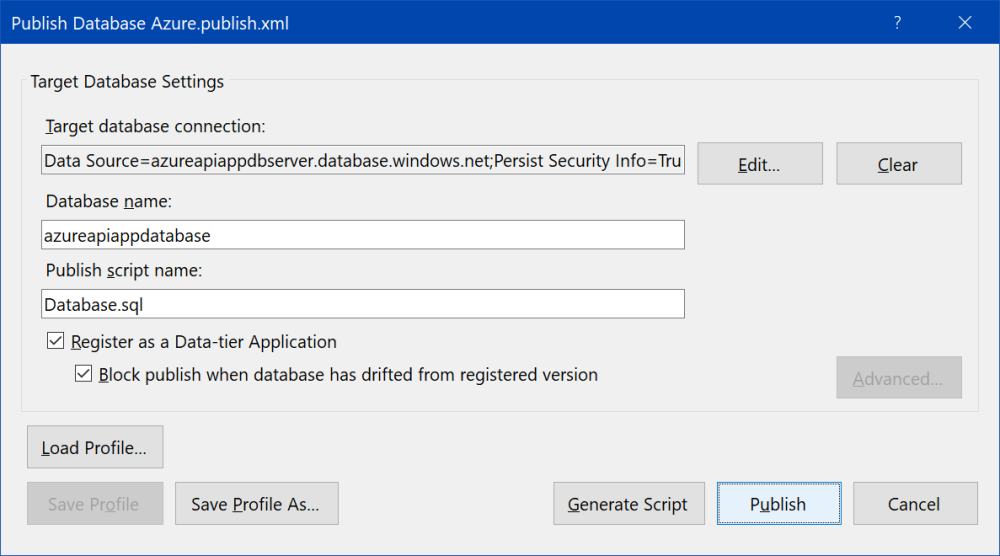
Right click on Database project and click on "Publish..." item. "Public Database" dialog window is shown.
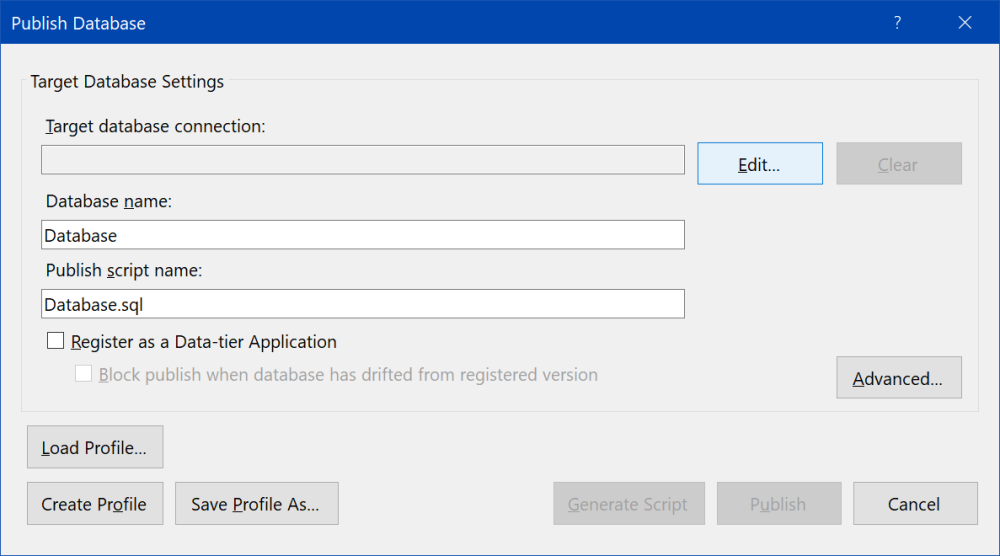
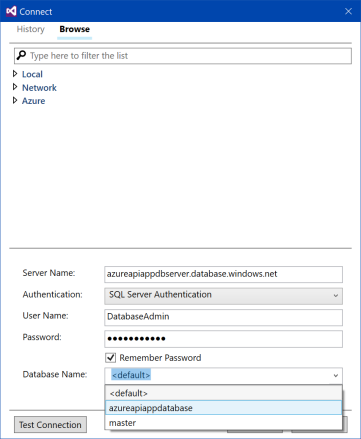
At first, it is necessary to set up connection string to created SQL database. Click "Edit...", "Connect" dialog window is shown, and choose the second tab "Browse". There are several options. It is possible to expand Azure node and choose created database, or set properties of connection.
Use the following values for properties of connection:
| Property | Value |
|---|---|
| Server name | azureapiappdbserver.database.windows.net |
| Authentication | SQL Server Authentication |
| User Name | DatabaseAdmin |
| Password | SQL Server user's password |
| Remember password | Check |
| Database name | azureapiappdatabase |
Then click "Test connection" to be sure all fields are correct.
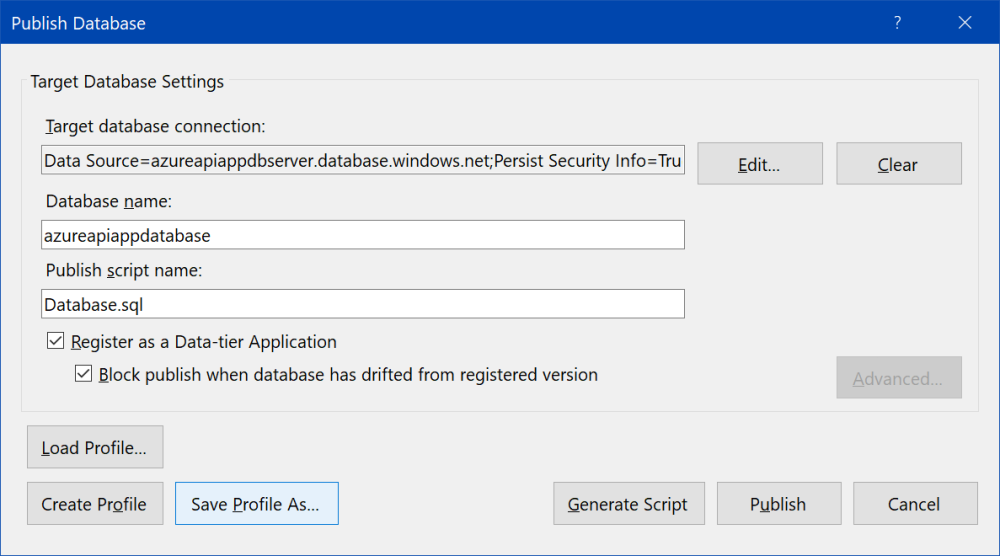
Check both options "Register as a Data-tier Application" and "Block publish when database has drifted from registered version". It prevents direct changes in SQL database.
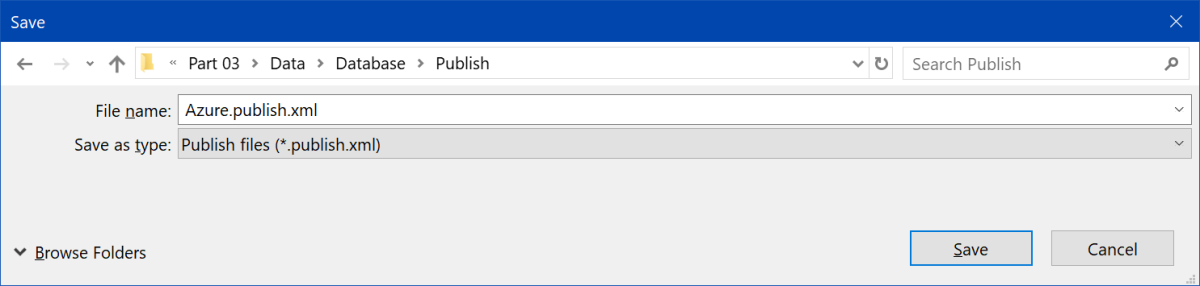
Click "Create Profile". Create folder Publish in project directory and save file with name Azure.publish.xml. It is good approach to add *.publish.xml extension to .gitignore, as these files may contains sensitive information. That is why provided solution doesn't contain publish files.
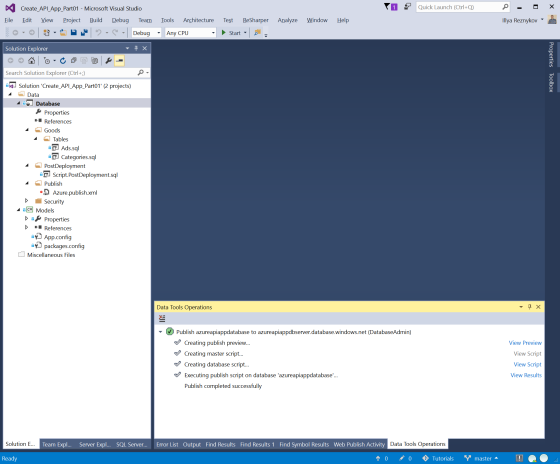
Click "Publish" and wait.
Check SQL database from Visual Studio
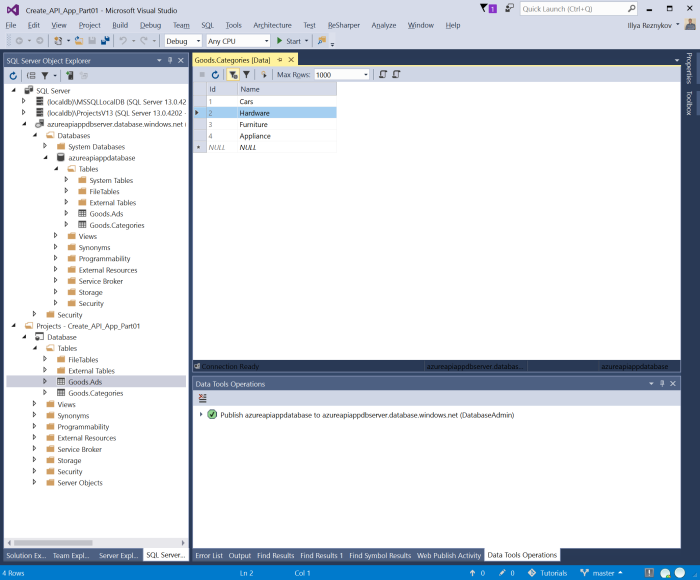
Open "SQL Server Object Explorer" window in Visual Studio (View|SQL Server Object Explorer).
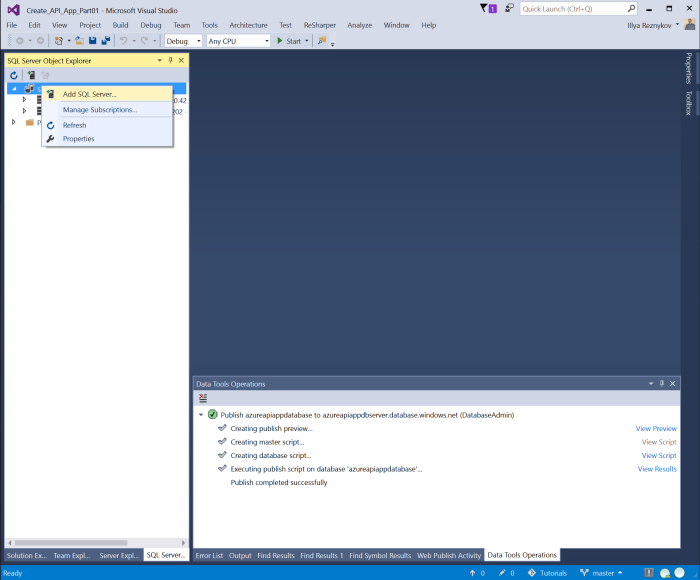
Expand and right click on SQL Server node. Click on "Add SQL Server...". "Connect" dialog window is shown.
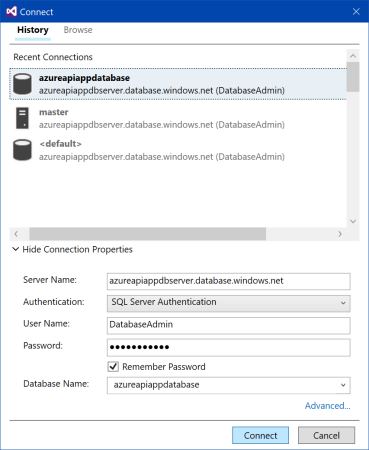
As connection to SQL database was used at previous step, it could be found in the list of recently used connections. Choose the first tab "History", click on azureapiappdatabase connection. Check value of properties, click on "Connect" button.
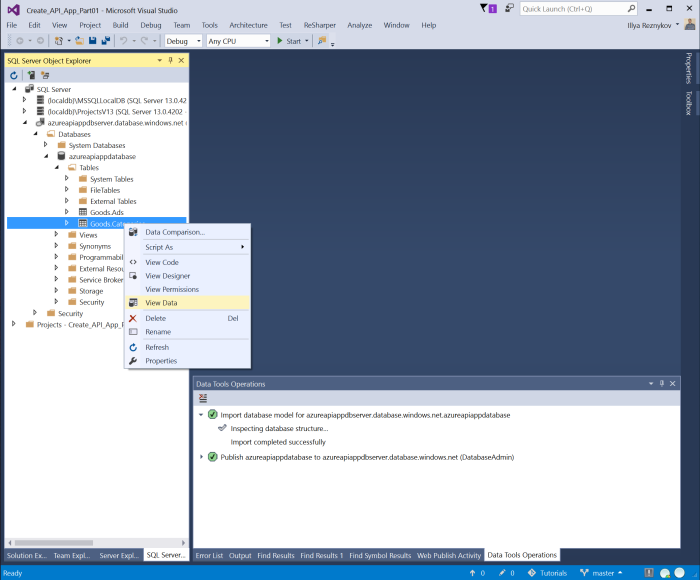
Now SQL Server node contains node with the name of SQL Azure Server: azureapiappdbserver.database.windows.net which contains childs like server node in SQL Server Management Studio.
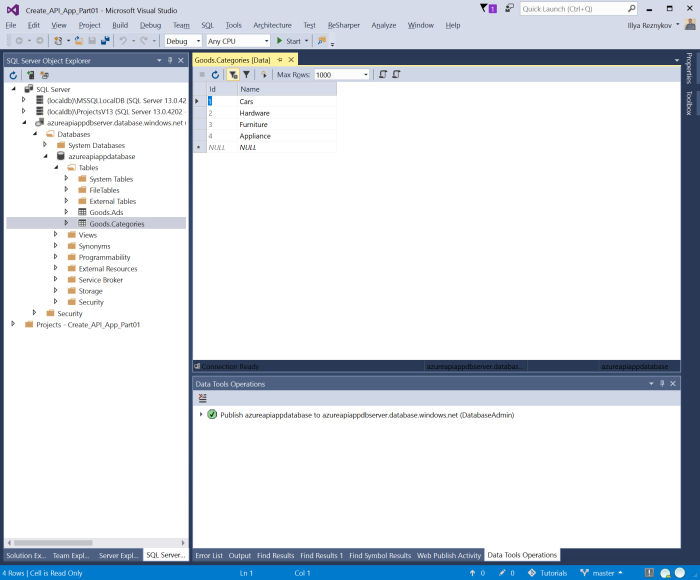
Expand tree up to table nodes. Context menu of table nodes allows view data, view DML code, etc. Right click on Goods.Category node, click "View Data". Window with data of the table is shown. Project contains post-deployment script and due to this the table after deploy contains some data.
Add data models with Entity Framework
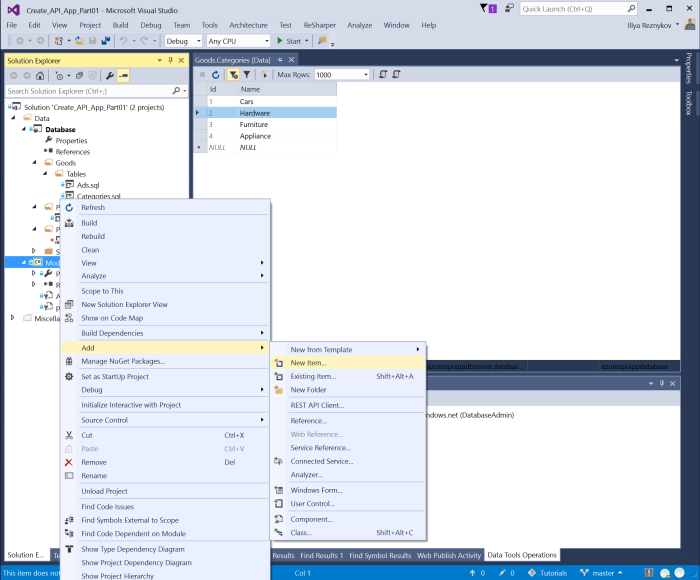
Switch to "Solution Explorer" window. Right click on Models project, click "Add", and then "New Item..."
Choose "ADO.NET Entity Data Model", input name "Goods", and click "Add".

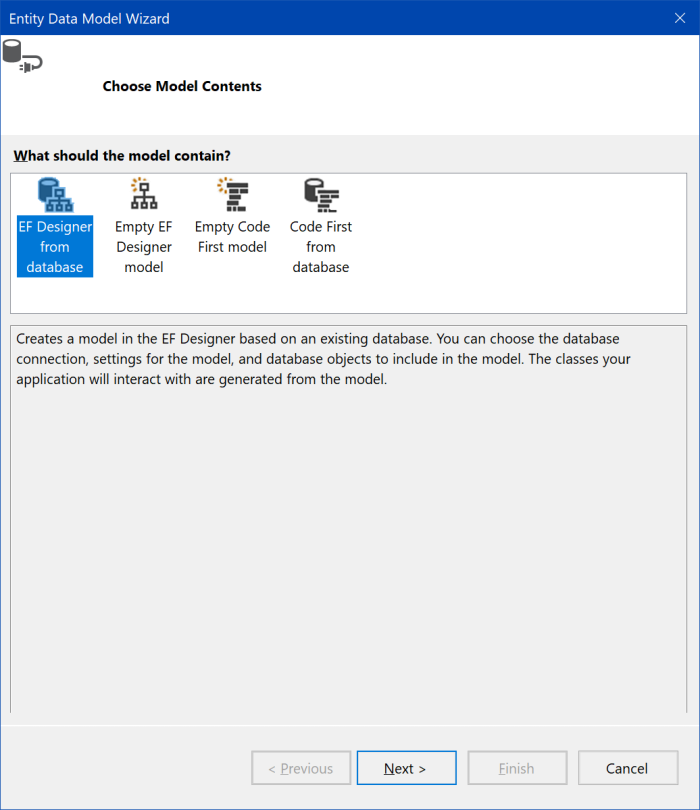
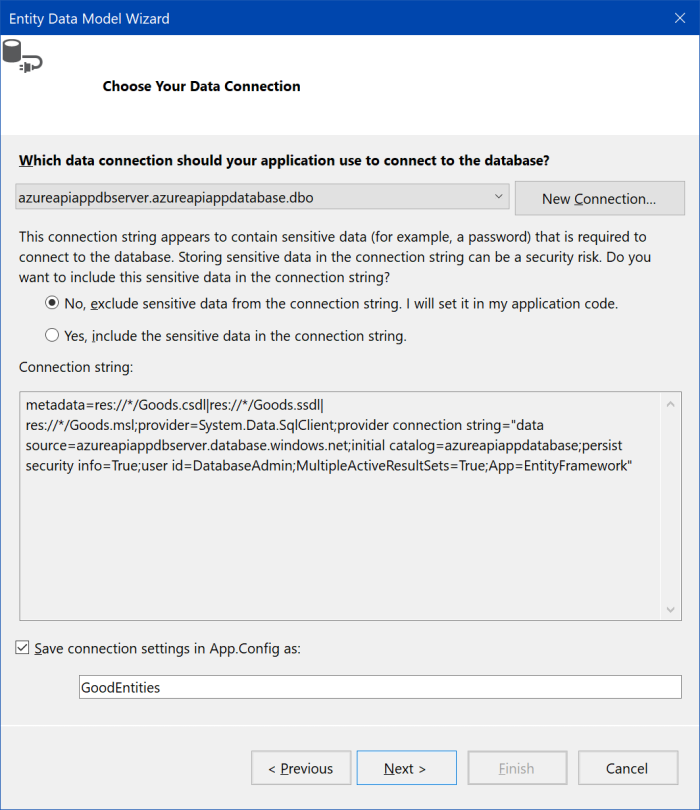
"Entity Data Model Wizard" window is shown. As database is already described, choose "EF Designer from database". Click "Next >".
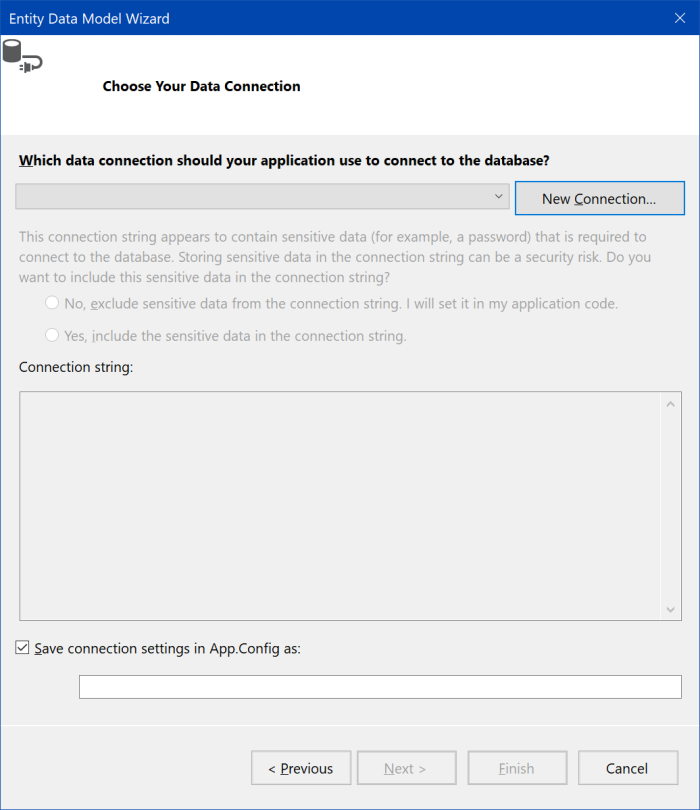
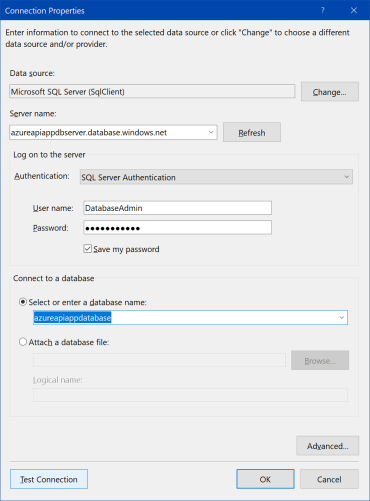
On the next screen, click "New Connection...". "Connection Properties" dialog window is shown. Use the following values for properties of connection:
| Property | Value |
|---|---|
| Data source | Microsoft SQL Server (SqlClient) |
| Server name | azureapiappdbserver.database.windows.net |
| Authentication | SQL Server Authentication |
| User Name | DatabaseAdmin |
| Password | SQL Server user's password |
| Save my password | Check |
| Select or enter a database name | azureapiappdatabase |
Click "Test connection" to be sure all fields are correct. Then click "OK" to close dialog window.
Check "Save connection settings in App.Config as:", input name GoodEntities and continue by "Next >".

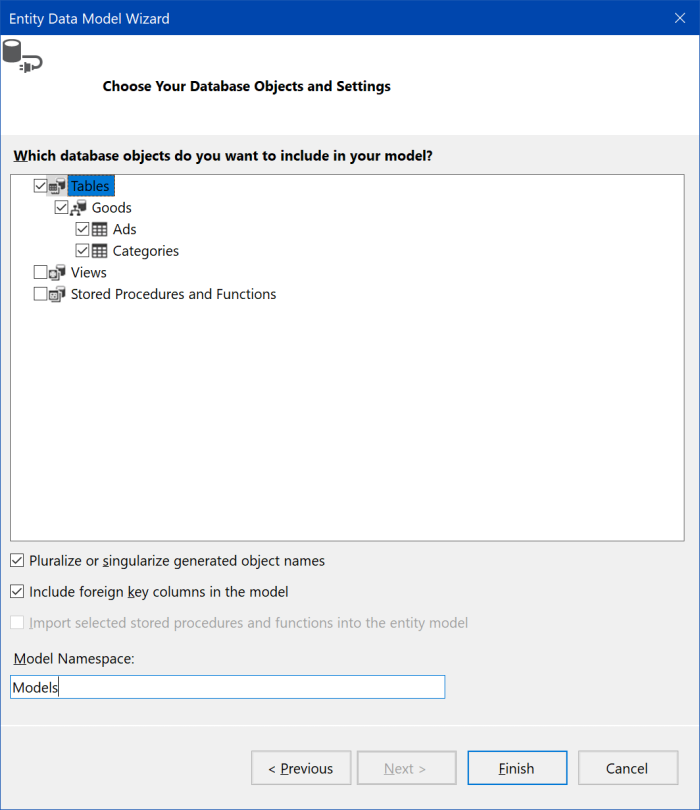
Check "Tables" node, "Pluralize or singularize generated object names", and "Include foreign key columns in the model". Input "Models" value for model namespace and click "Finish".
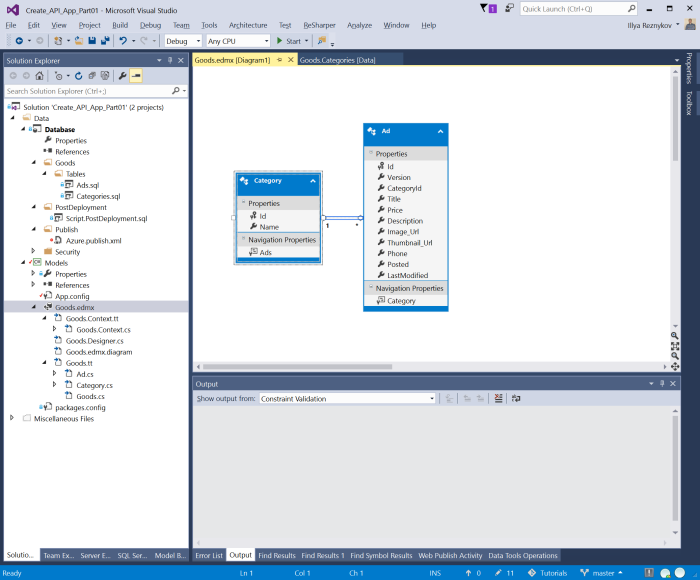
New Entity Framework was created, and Visual Studio shows context diagram.
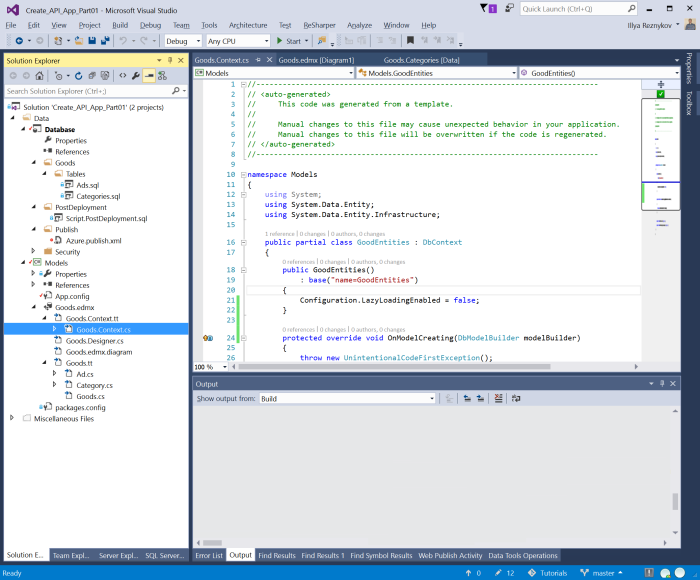
Open file Goods.Context.cs or find Goods.Context class. Find constructor and turn off lazy loading by the following line of code:
Configuration.LazyLoadingEnabled = false;
It prevents REST service methods from loading referenced objects.
1. All used IP-addresses, names of servers, workstations, domains, are fictional and are used exclusively as a demonstration only. 2. Information is provided «AS IS».